Showing posts with label Salem. Show all posts

Monday, March 22, 2021

Salem Thattuvadai Set


There are so many triggers for nostalgia and to me food definitely comes up in the top few. There was this street snack I used to enjoy as a high school kid usually after a tuition class or a weekend trip to the "shopping complex".  The Salem famous Thattuvadai Set. This such a simple yet tasty and healthy thattai sandwich. A thattuvadai or thattai is a thin crispy  deep fried snack made with rice flour and urad flour. This is also known as nippattu or chekkalu in neighbouring states. This healthy sandwich involves 2 chutneys (red and green) and a some crispy vegetables. I was never a big fan of beetroot and that too raw....no way. However just in this one instance even raw beetroot tastes great. This was one snack which I haven't tried (does 30 years count as long?) a long time. Fast forward to last week I found these yummy crispy thattais made by one of my friends here. So without further ado here comes the recipe.


Ingredients

Red Chutney

  1. Dried Kashmiri chillies - 3 to 4 (for the colour)
  2. Dried red chillies - 2 to 3 (for the heat)
  3. Sliced Red onions - 1
  4. Garlic cloves - 4 to 5
  5. Tamarind (softened) - 1 teaspoon
  6. Tomato - 2
  7. Salt to taste
  8. Vegetable oil
Green Chutney
  1. Coriander leaves - 1 cup
  2. Mint leaves - 1/2 cup
  3. Green chillies - 8-10
  4. Grated coconut - 2 table spoons
  5. Salt to taste
  6. Ginger - 1 inch
Salad
  1. Carrot
  2. Beetroot
  3. Onion
  4. Green Apple (this was my twist - raw mango is used typically)
  5. Lemon
  6. Chopped Coriander leaves 
And of course a lot of thattais. Preferably the bite sized mini ones.

Method

Red Chutney
  1. Blend all the ingredients of the red chutney together to a smooth paste.
  2. In a wide sauce pan heat 2 to 3 table spoons of vegetable oil and saute the paste for a few minutes until oil separates.
Green Chutney
  1. Blend all the ingredients of the green chutney. (Yup nothing more just blend).
Salad
  1. Slice the onion into thin slices.
  2. Slice the remaining vegetables in equal amounts.
  3. Mix them up in a bowl.
The Set
  1. Take a thattai and smear it with the green chutney. Repeat as many as needed.
  2. Place the salad on the thattais and sprinkle lemon juice over along with chopped coriander leaves.
  3. Take thattais and smear it with the red chutney and place on top of the salad.
Best served on a piece of newspaper to get the authentic feel and consumed as quickly as possible.

Enjoy!!
C

Monday, June 4, 2018

Ellu Urundai a.k.a. Sesame Laddu

am sure we all grew up with a variety of sweets and desserts from wherever we came from. Usually that brings joyful memories since sweets are usually made or bought on special occasions. Salem has a variety of such delicacies of which one is being presented here - Ellu Urundai meaning Sesame Ball. Ellu Urundai is usually made or consumed around the festival of Saraswathi Puja or Ayudha Puja. I tried making it a few times and it was a hit with the kids. However I couldn't get the exact colour, taste and consistency, which I managed to get this time. Sweets as in baking are quite finicky that you have to watch out very carefully during the cooking process. A few seconds here and there can change the outcome totally.  So here it comes...


Ingredients


  1. Sesame seeds (white) - 1 cup
  2. Jaggery - 1 cup (Jaggery and Sesame seeds should be in 1:1 ratio)
  3. Cardamom seeds - 1 teaspoon
  4. Ghee - 3 tablespoons

Method

  1. Dry roast the sesame seeds in a large wok until they start to splatter or some of them start turning brown.
  2. Set it to cool in a large mixing bowl.
  3. Smash the jaggery if in the hard form and mix it with about 1/4th cup of water along with the cardamom seeds.
  4. Boil the jaggery water for a few minutes and drain the content to remove any impurities.
  5. Continue to boil the drained jaggery water until you get to the required consistency. This is THE most important step in the entire process. As soon as you feel the syrup thickening try to add a drop of the syrup in a small cup of water. If the syrup dissolves you need to continue boiling. If the syrup coagulates and if you are able to make a small ball, that is when you need to stop boiling the syrup.
  6. Pour the syrup over the seasame seeds, add the ghee and mix it well.
  7. Give it a minute or so to cool down - but not more than that.
  8. Quickly start making balls greasing your palm with ghee. This is the next most important step to take care because if you delay this process the mixture hardens up really quick and goes beyond redemption.
Happy Cooking!!

C

Tuesday, October 24, 2017

Mundiri Cake a.k.a. Cashew Cake / Slice

Hope you all had a great Deepavali / Diwali!! Mundiri (Cashew) cake is one of my favourite childhood desserts that I have relished from don't know when. Later on over the years I got introduced to the North Indian version of it known as Kaju (Cashew) Katli (Slice). This is one dish that could be called in many names Cake / Slice / Katli / Barfi - what not. As they say rose is a rose is a rose - and so is Mundiri Cake. While it has many names, forms and recipes, here's my own -  mixing a bit of my mom's recipe with some found on the internet. It's a fairly simple but a long process. Hope you could try it out for your next event. Wait - you don't really need an event for this one. Just do it. :)

Ingredients:


  1. Cashews - 2 cups
  2. Sugar (I used raw sugar) - 3.5 cups
  3. Milk - 2 cups
  4. Ghee (Clarified Butter) - 1/2 cup
  5. Nutmeg powder - 1-2 teaspoons
Note: You can add more or less cashews but make sure the ratios are kept intact.

The Method:

  1. Grind the cashews in a food processor - preferably using the pulse option. (I saw somewhere that a normal blend turns it into a paste.) Make sure not all of it is smoothly ground and leave a bit of chunkiness for the texture.
  2. In a large (thick) sauce pan mix the ground cashews, sugar, milk and nutmeg until all blended well.
  3. Boil the mix under low flame until the milk evapourates while stirring the mix with a spoon (preferably wooden) constantly. This is to ensure that there are no lumps formed none of the mixture gets burnt. This is the most time consuming step of this recipe and could take a good 20 - 30 minutes depending on the quantity.
  4. Stop the process when the mix is still in flowing consistency but separates easily from the vessel. Almost like an oats porridge consistency if that could be a reference.
  5. Remove the pan from the heat and mix the ghee into it until it gets mixed evenly. You might see some ghee oozing out - which means its excessive and you can carefully drain it out.
  6. Grease a deep tray with ghee - preferably rectangle or square in shape and pour the mix into the tray.
  7. Leave it to cool for a minute or 2 and draw lines diagonally to make diamond shaped slices.
  8. Let it cool for about 5-10 minutes and slice it up using a sharp knife. Do not leave it for too long else the slices will get brittle (as in the pic below).
  9. Soft and chunky Mundiri cake ready to be served. It can be boxed and stored for up to 10 days. I prefer not to refrigerate desserts since it would require reheating and it may not have the same taste.
Enjoy!!

C


Wednesday, January 4, 2017

Carrot Rice

Happy New Year folks!!  Hope you all had a good start to 2017. Mine surely did with a few tasty experiments at home. The first post for this year is a childhood favourite of mine - Carrot Rice. This is my mom's recipe with a bit of twist here and there. This is one of those rice dishes that doesn't taste too bad when gone cold - having packed it many times for lunch at school. This is a fairly simple and easy to cook as well. Hope you will try this. Do let me know how it turned out.

Ingredients

  1. Grated Carrots - 2 cups
  2. Cumin seeds - 1 tablespoon 
  3. Onions - 2
  4. Green chillies - 4/5
  5. Ginger Garlic paste - 1 table spoon
  6. Cashews - 1/2 cup
  7. Ghee (Clarified Butter) - 2 table spoons
  8. Garam masala - 1 tea spoon
  9. Butter - 150 gms
  10. Basmati rice - 2 cups
  11. Bay leaves - 3 or 4
  12. Turmeric
Method

  1. Pressure cook the basmati rice (1:2 water and 1 whistle) and let it cool.
  2. Heat a wok / kadai and melt the ghee and butter until they liquefy.
  3. Shallow fry the bay leaves, and cashews for a few minutes until the cashews turn golden 
  4. Add the green chillies, cumin, onions, turmeric, garam masala and ginger garlic paste and saute for a few minutes until the onions turn translucent.
  5. Add salt to taste. 
  6. Add the grated carrots and quickly toss it around for about a minute.
  7. Add the basmati rice and mix it thoroughly making sure the rice is all separated and not lumpy.

Carrot Rice Ready!!


Happy Cooking!!

C

p.s.: Please remember to share the post if you like it.

Sunday, January 24, 2016

Roti (Bread) Roast - A Salem Delicacy

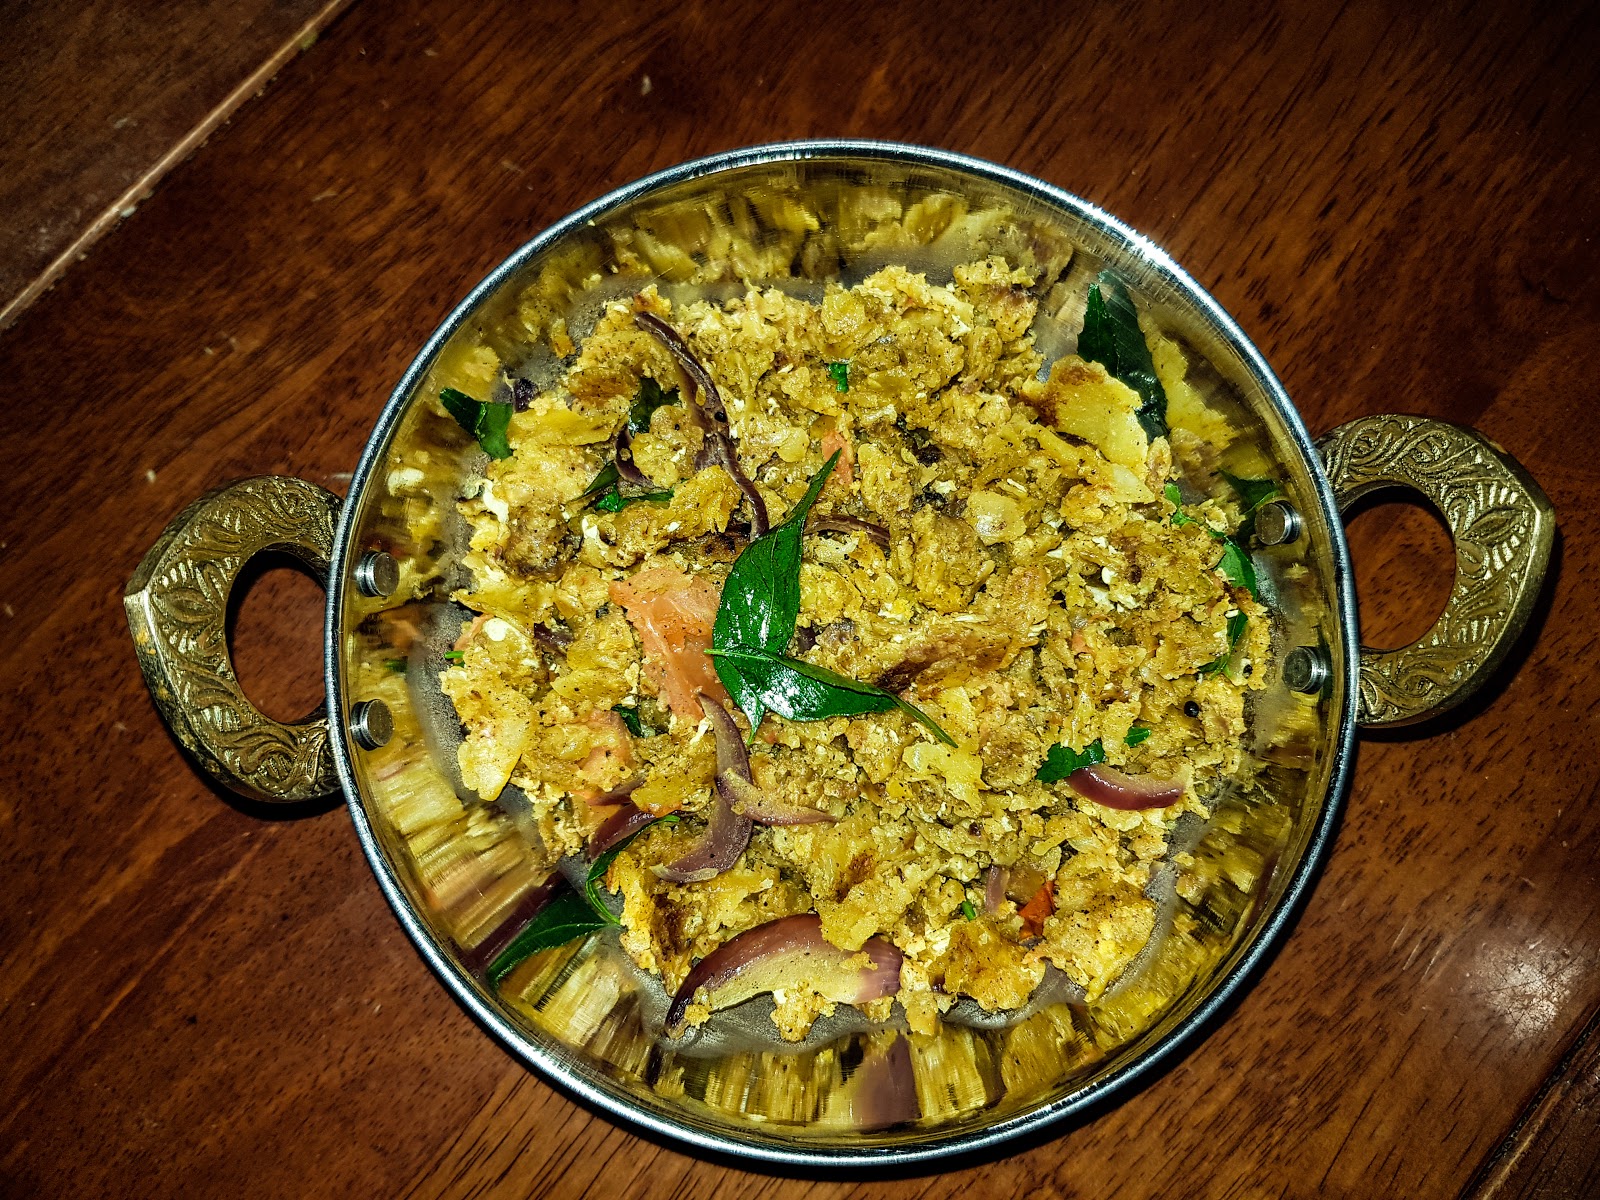
Roti (Bread) Roast - dish made out of typical sandwich bread (white / wholemeal) was a dinner tiffin item I grew up with. It was a delicacy / specialty whenever we had guests at home so it had it's own special value. In the last 2.5 months my mom stayed with us I had the privilege of re-living some of my childhood favourites. This would be the first of those series of my Mom's recipes. Apparently this recipe is known / available in very few restaurants in Salem when they were not supposed to eat non-vegetarian food for religious reasons. Hence a good substitute when you have a craving for meat but can't. Here it comes....


Ingredients:

  1. Bread - cut into 1 inch thick cubes
  2. Diced Onions
  3. Diced Tomatoes
  4. Ingredients for Masala
  • Grated Coconut
  • Ginger
  • Garlic
  • Poppy seeds
  • Cinnamon sticks
  • Cardamom
  • Cloves
  • Fennel seeds
  • Coriander seeds
  • Cumin seeds
  • Black Pepper
  • Dried Red Chillies
5.  Mustard seeds
6.  Channa dal
7.  Urad Dal
8.  Cashews
9.  Curry leaves

The Method:

  1. Roast the bread with oil in a large pan / wok and keep aside.
  2. Blend the ingredients for Masala into a coarse paste with minimal water.
  3. In a large wok temper the mustard seeds, channa dal, urad dal and curry leaves with oil.
  4. Saute onions until golden brown
  5. Saute tomatoes for a few minutes until it becomes a bit mushy
  6. Add the masala paste and saute until oil separates
  7. Add a bit of salt to taste.
  8. Add the roasted bread and saute until masala is mixed well. Make sure the bread doesn't get too mushy
  9. Garnish with coriander leaves and serve hot.
Enjoy!!

C

Saturday, September 19, 2015

Masala Pori - Spicy Puffed Rice

Masala Pori - one of those snacks from Tamil Nadu one couldn't have avoided growing up with. Be it the home made variety with all the nuts and spices or the one you would get in a school canteen (or the Marina beach) with just the masala. I still remember buying packs of maybe 10-20 grams each for 25p ($0.005). Haven't had many opportunities to relish this snack once I left Salem (or maybe since middle school?). About 2 years ago Uma got to learn this recipe from her mom when she was in Sydney. As expected this is a huge hit with the kids - young and old. Since then we have been enjoying this every once in a while. It's school holiday time in Sydney and am sure very soon in some parts in India as well. This could turn out to be a simple, quick and handy snack to have at home for the holiday season.


Ingredients


  1. Pori (Puffed Rice)
  2. Mustard seeds
  3. Garlic
  4. Dried Red Chillies
  5. Curry Leaves
  6. Roasted Channa Dal (whole/split)
  7. Peanuts (Raw or Roasted)
  8. Sambar powder
  9. Turmeric
  10. Red Chilli powder
  11. Salt
  12. Vegetable Oil


Method

  1. Heat a few table spoons of vegetable oil in a large kadai / wok.
  2. Saute the mustard seeds until they splatter.
  3. Saute garlic, chillies and curry leaves for a few minutes until the garlic gets fried.
  4. Add the roasted channa and peanuts and saute for a few minutes
  5. Add the spices - salt, chilli powder, sambar powder and mix it up.
  6. Add the puffed rice and mix it thoroughly under heat for a few minutes.
Voila - Masala Pori Ready!!


Happy Cooking

C

Monday, May 2, 2011

Parotta

Parotta or புà®°ோட்டா (burotta) as it is called in Tamil Nadu is such a versatile flaky bread which can be consumed in many ways. Am yet to find a parotta to beat the one from K.R. Bhavan - Salem.  Parotta is the ultimate evening snack (or dinner). Kurma soaked parotta wrapped in plantain leaves parcel. Yummm... 

Once I left Salem, having a good parotta has always been a treat. After going to US I had to console myself with those frozen malaysian "parathas" - until of course the frozen "malabar parottas" came into being. For a very long time I have been wanting to try my hands at it and last weekend made it a point to give it a shot (thump). Parotta making is definitely a skill that I need to "master" over time. Maybe that's why the parotta makers are called "master". :-)

Ingredients
1) Maida (All purpose flour) - used 3 cups
2) Egg white (1 egg)
3) Salt (1 tablespoon)
4) Oil - used Olive Oil (heaps of them)
5) Water

The process

Mix the ingredients on a wide bowl with lots of oil to make a nice smooth dough ball. Once the ball is made hit it (thump it) hard on the kitchen table. While I was doing it Uma was asking if I was showing my "love for her" on the dough. I continued harder... ;-)

Cover the dough with a wet cloth and leave it aside for a few hours.

After a couple of hours make big lemon sized balls out of it. One tip here is to make the balls fairly big - about 4 inch diameter. I made them small and they turned out too small to my liking.


Cover the balls again with wet cloth and leave aside for about an hour.


Now comes the fun part. Take a ball and spread it out as thin as possible on the kitchen table. If you are really skilled you can flip them out like a master. However until you reach there you can just try spread the dough out thin using your fingers. The trick here is to have enough oil on your hands and the dough that it doesn't break apart. If it does...well you know you need more oil.


Once spread out, fold it in multiple layers or pleats and roll them like a Cinnabon roll.


Once rolled, take these rolls and press them out flat with your palm and once thin enough cook it on a tava. Should take about 2-3 minutes cooking time per parotta.

Yummy parotta ready:

Best eaten with chicken curry or kurma. And yes, once cooked, pile them up and give it a nice smack on the sides to loosen them up a bit to make them soft.

Enjoy...

C

Thursday, April 7, 2011

Kothu Parotta


Every country boasts of it's own "street food". Pad thai for Thai, Kway Teaw for Malay, probably a hot dog for the US of A. When it comes to South Indian cusine, my vote would be for Kothu Parotta. Kothu parotta (meaning "chopped" up parotta) is a typical road side delicacy you would find on any road side non-vegetarian stall in Tamil Nadu. If my memory serves right, the first time I had a "professional" kothu was on a roadside shop on the way from Coimbatore to Salem. Don't remember the place, but probably returning from one of my uncle's wedding. My first successful kothu  was done in Portland, OR with the help of THE Mangalam masala. I have to time the preparation of KP right along with making a chicken curry and hence the perfect sequel to Chicken Chettinad. Left over chicken curry gives the extra kick or the professional touch. 

What goes in:

  1. Parotta. This has to be the flaky kerala style or ceylon style parotta available in Indian stores. For those in India...try to get it from the nearby kaiyendhi bhavan (road side shop).
  2. Eggs
  3. Onions
  4. Tomatos
  5. Chicken masala powder
  6. Chicken curry (Should not be too thick. If thick, lighten it up with water.)
  7. Green chillies 
  8. Curry leaves 

The method:
  1. Chop up the parotta into as small pieces as possible. Recently I found a technique with the frozen parottas. I heat it up on a tava and chop (kothu) it up with a knife. I used to do it with hand but found the knife to be doing a better job. (Edit: I used a blender today and "pulsed" the parotta. It gave a texture close to what you get in a restaurant.)
  2. Beat up the eggs separately to make an even spread. (Or just break it open on the parotta later).
  3. Sautee mustard seeds until they splatter.
  4. Sautee the green chillies and onions for a few minutes.
  5. Add the tomatoes to the mix. Need to make sure we dont over cook the tomato. Should maintain the chunky pieces.
  6. Add the chopped up parotta and the masalas (powder and half of the chicken curry).
  7. Add salt as required.
  8. Mix it up well so the masala gets mixed evenly.
  9. Create a space in the middle of the kadai by pushing the parotta mix to the side. (Alternatively just break open the eggs on the parotta or pour the beaten egg over the parotta).
  10. Pour the beaten egg and scramble it until its 3/4ths cooked.
  11. Mix up the parotta along with the scrambled egg so that a light coating of the egg is applied on to the parotta as well.
  12. Empty the remaining chicken curry into the mix.
  13. Add curry leaves and coriander as garnish and give it a final toss.
The result:

Enjoy

C

Sunday, March 13, 2011

Ulibitambaram

Ulibitambaram - This one word typically explains where I come from. Some people call it Sambar - but no this is different. The name if translated says Uli (Tamarind), bittu (added), ambaram (curry, soup....er, Sambar). In the western world one can call it a Lentil soup with Tamarind.


As I was thinking of a good dish to begin the Blog, this was one that went way back to my roots and I couldn't shrug it away. Even though we hardly make it these days. This was one of my signature dishes for a long long time amongst my friend's community. The very first time I had actually seen how this was cooked was at K.R. Puram (Bangalore) - thanks to Radha (Sethuraman). (Radha, Sridhar, Puneet, Phani & Biju - if you are reading this...hope you remember that sambar). From then on, there was no stopping for my Ulibitambaram. 


Ulibitambaram comes in various shapes and forms depending on the primary vegetable. It is quite versatile that way, you can make it with almost any veggie. However, THE Ulibitambaram  is the one made with Drumstick (Nuggikkai). Nuggikkai Ulibitambaram - it simply rocks. It can be had with any side of poriyal (sabji/stir fried veggies), but the best would be with Appalam (Ambi's appalam if you can get it).


If you want to try it:


What goes in:

  • Toor Dal
  • Oil (Any kind that suits you)
  • Turmeric powder
  • Asafoetida
  • Red chilly powder
  • Salt
  • Onion
  • Tomato
  • Vegetable (Pick any that is  fleshy)
  • Mustard seeds
  • Tamarind water
  • Badaga (An exotic mix of shallots, mustard seeds, curry leaves and what not. More about this in a later post)
The way I do it:

1) Pressure cook the Toor dal  (about 2 -3 whistles.) with a few drops of oil and a pinch of turmeric powder.
2) While the dal is being pressurised you can start with the veggies.
3) Heat a deep pan and sautee the mustard seeds until they crackle.
4) Sautee the onions until they become translucent.
5) Mix in the veggie. Add turmeric powder, Asafoetida and red chilly powder. Sautee for about 3-4 minutes.
6) Add the tomatoes and continue sauteeing until the tomatoes are soft.
7) Add water as much as you want. You can't go wrong here. If it gets too thick, serve the same as Dal. If it gets too watery serve it as Rasam. :-) If you want to get it just right - experiment. :-) 
8) As the water comes to a boil add in the tamarind water. I usually save some for a later point to touch up if I don't get enough sourness.
9) Once the tamarind added soup comes to a boil add in the pressure cooked Toor Dal.
10) Oh yes, somewhere in between do add salt to your liking.
11) Let the mix to boil. Usually until the veggies are soft enough. However you can leave it longer if you want to thicken the plot...er Sambar.
12) Sautee the Badaga in oil and garnish the Ulibitambaram. THIS is the secret ingredient here. (I wonder how I missed it the first time...thanks to staying away from India for a long time!!)

Yes, you really don't need Sambar powder to make Ulibitambarm (or any Sambar for that matter).

This is to be served with Sona Masoori rice. If had with any other variety (Basmati or Jasmine) it would kill the taste.

Happy Cooking !!

Bleepers:
1) Today while this was being prepared, the blog was so much in my mind that I forgot putting the weight on the pressure cooker. Just a little mess...nothing that could not be taken care. ;-)

2) As I added water Uma came by and had a question about the water level. Well...just had to simmer it a few extra minutes to get to where I wanted it to be. :-)