Friday, April 22, 2011

The Manchurian (Gobi)

Hello,

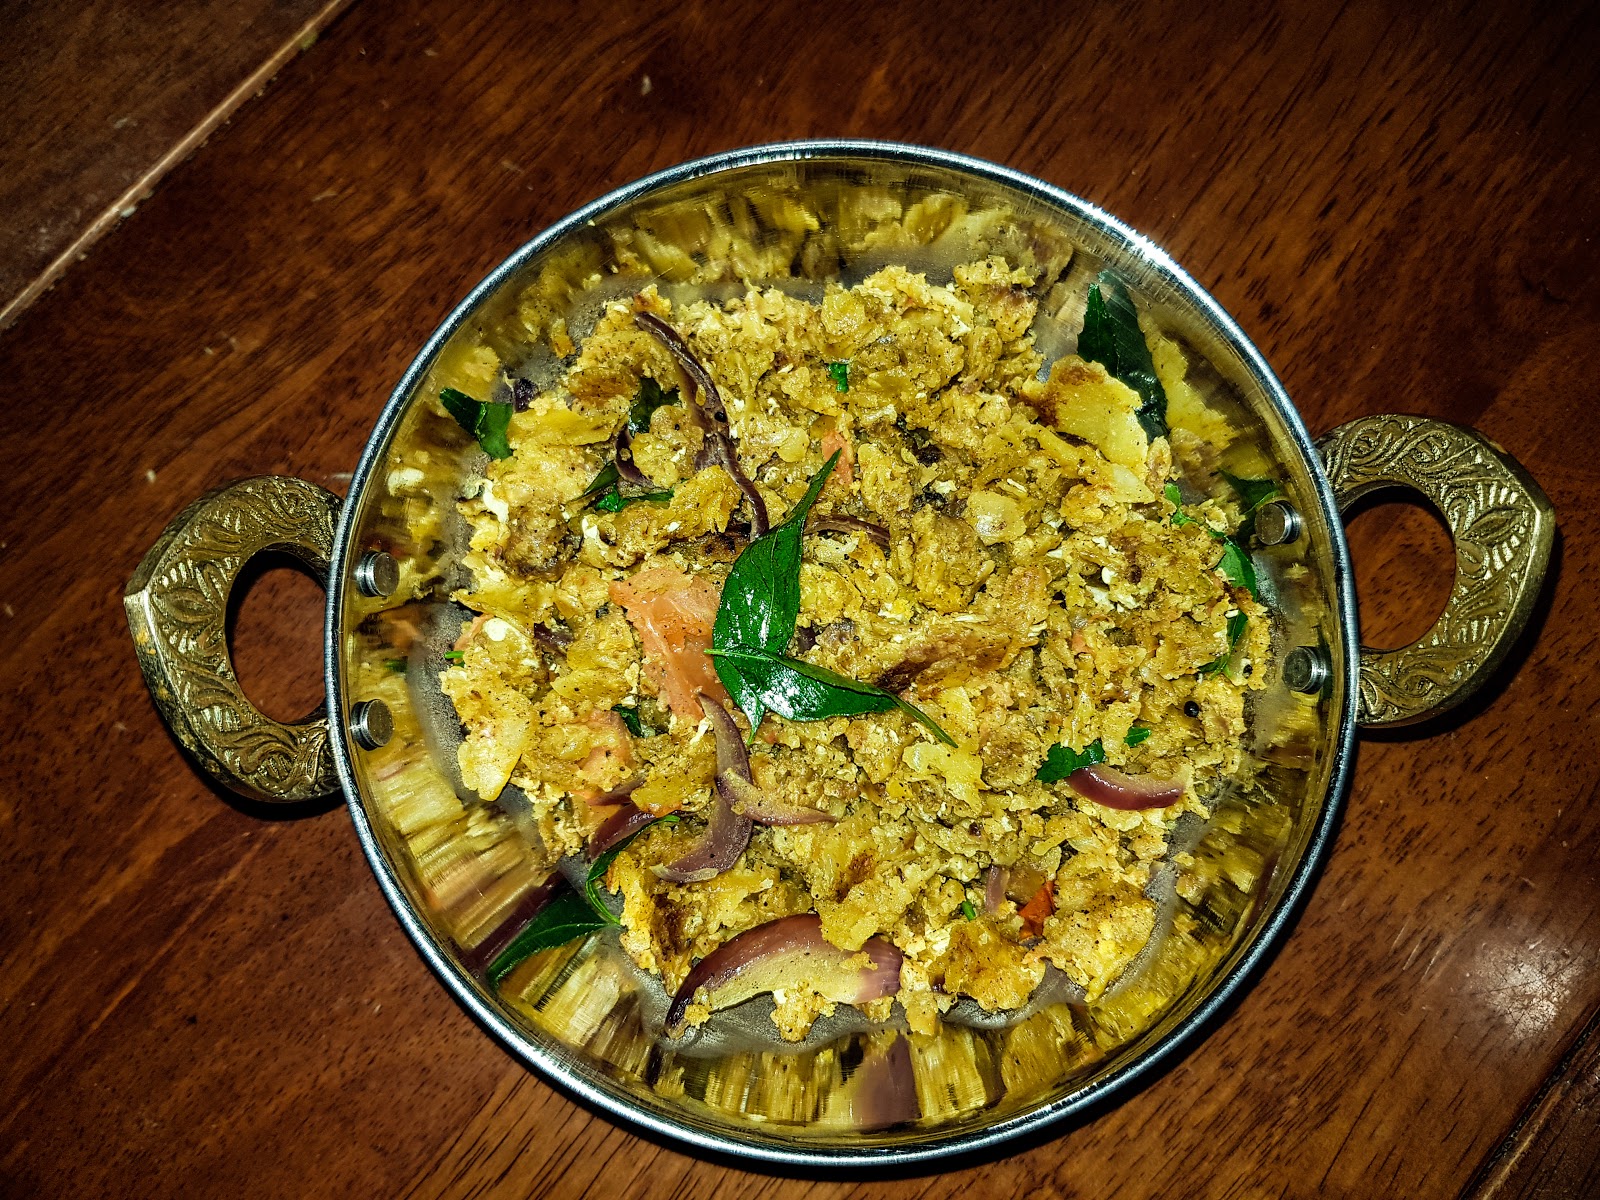
Gobi (or Gopi as one of my mates would call it) Manchurian is one dish that I definitely did not grow up as a kid. It probably started from my late teens and upwards (and still going). A staple appetizer / starter that one would order in any Chinese restaurant in India. There are 2 variations to this -  dark brownish version found in propah Chinese restaurants (in India) and the orangish version more popular in the non-chinese restaurants. This one I tried is the later.
And of course there is the other choice you need to make whether it is the dry or the gravy or saucy version. Coming out of India, this is one dish that I've always longed for because you don't find that normally in Indian restaurants in US. However in Australia  I can find it more frequently.

What goes in:


For the batter:
1) All purpose flour (Maida) - 2 Cups
2) Corn Flour - 2 Table spoons
3) Eggs - 2
4) Salt
5) Food colouring - A pinch or so... Completely optional. I tried a saffron colouring, turned out OK.


As mentioned earlier I would attempt to give as accurate measurements as possible with anything involving  flour and egg, . The batter is a very important aspect which makes or breaks a good manchurian. Sometimes it gets too water, or too crispy or too floury. I found that the above measurement worked out just fine. If you need more or less apply your ratios as required.

Main Ingredient - Gobi (Cauliflower) florets. This of course can be replaced with pretty much anything you want. The only difference would be in the time it takes to deep fry. You can try a bite size piece of chicken, paneer, fish.

For manchurian kick:

1) Garlic - thinly minced
2) Green chillies
3) Soy sauce
4) Tomato sauce (skip this if you prefer the brown version)
5) Vinegar - 1 tablespoon - try not to overboard on this - you might have to give a different name to the dish then. ;-)

6) Spring Onions

The process:

1) Cut the cauliflower into bite size florets. Too big or too small will cause a problem with deep frying.
2) Prepare the batter by whisking in all the ingredients with about half a cup of water. Keep adding water only as much as needed. The result should be a fairly thick batter which would cover up the Gobi and stick together.
3) Leave the batter to settle down.
4) Mince the garlic, chillies and the spring onions.
5) Deep fry the Gobi in batter. It normally takes about 2-3 minutes for a batch. Try not to under or overcook it. Got to watch the temperature of the oil and control the flame (or heat) setting accordingly.
6) In a large wok, sautee the garlic, chillies and the bottom part of the spring onions. Use about 3/4th of the garlic you have to sautee.
7) Add in the sauces - tomato, soy and vinegar and mix it up for about a minute.
8) Toss in the deep fried Gobi and stir fry until the sauce is evenly mixed.
9) Add a little of the remaining garlic and stir.
10) Garnish with finely chopped spring onions.


For the saucy version:
1) Before you toss in the Gobi, add as much water you need and get the mixture to boil.
2) Add corn flour water. Can't measure this since completely depends on how much sauce you need.
3) Once the sauce is thick enough add in the deep fried Gobi.

Warning: Gobi Manchurian is Addictive - Enjoy Responsibly!! ;-) (Our guests last night almost did not eat dinner after the starter).

Enjoy.. :-)

Wednesday, April 20, 2011

Gaeng Kieow Waan - Thai Green Curry

Green Curry - this is something that I just made some memories with. Every time I see that in a Thai menu, I have invariably skipped it. Probably the colour was not too appealing. However a few months ago had an opportunity to have a taste of it (of course at Saap Thai!!). The colour is just so misleading. This time I attempted a green curry from the scratch.

Things needed for the curry paste:

a) Coriander leaves and stems (Cilantro for those in the US of A) - This is what actually gives the colour to the curry.
b) Lemon Grass
c) Kaffir lime leaves
d) Galanga root
e) Green chillies
f) Garlic

Traditionally you are expected to make a paste out of the above ingredients in a mortar and pestle. Which I did this time. However, at the end I cheated by running it through the blender once to make it a smoother paste.

Other ingredients:

1) Thai egg plant - This is a must to make this authentic. In case you don't...nah...don't bother. :-)
2) Chicken (or any other meat or non-meat chunk)
3) Fish sauce
4) Coconut milk

The method:

1) Sautee the green curry paste in oil for about 3-4 minutes.
2) Add about half a cup (or half of whatever you have) of coconut milk and mix for about a minute.
3) Add chicken (or anything else you need to cook well) and cook for about 5 minutes.
4) Add the egg plant and cook for about 10-15 minutes.
5) Add fish sauce (or salt) to taste.

At first I was not impressed with the flavour so added a little more of:
a) Kaffir leaves
b) Grated galanga root
c) Fish sauce

The Kaffir and Galanga brings out the typical Thai flavours in any curry.

The output:


The looks as I said earlier may not be too appealing - but if you like Thai food...then you must try this.

Enjoy...

Tuesday, April 19, 2011

Pad See Eew Kee Mao


Pad Kee Mao Vs Pad See Eew - I've come up with my own concoction "Pad See Eew Kee Mao ". Pad see eew does not have basil. The key ingredient there is the choy sum spinach and of course flat noodles and dark soy sauce. Pad kee mao does not usually have the greens or the egg. However I always mix them both when I order my lunch at Saap Thai (Eagle Thai in Sydney) and hence this recipe. If I were to have a garden, there will be 2 plants that are mandatory - Curry Leaves & Basil Leaves. I keep mixing with Italian Basil / Sweet Basil and Thai basil / Hot Basil. Not able to figure out the differences (yet).

What you need:


  1. Flat Rice noodles (preferably the fresh one)
  2. Minced garlic
  3. Choy sum  (or any other type of spinach with stems). The leaves and stems have to be separated.
  4. Soy Sauce
  5. Fish Sauce
  6. Kecap Manis (Gives you the colour and the sweetness)
  7. Oyster Sauce
  8. Sugar
  9. Eggs
  10. Basil leaves
  11. Thai Red Chillies
Note: Vegetarians feel free to skip the fish and oyster sauce. 


The method:

  1. I had bought the fresh flat noodles - the uncut version. It looked like a rice dhoti. Had to cut them to the size I wanted. Made  2" x8" (approximately) strips.
  2. Rinse the noodles under warm water and separate them out.
  3. Chop the veggies as in the photo above. Most important is to have the choy sum leaves and stems separate.
  4. Heat a large wok on high heat and pour a generous amount of oil and swirl it to coat the wok.
  5. NOTE: From this point on just use what you need for 1 - 1.5 servings. Do not try to cook for the whole party in a single go. It is time consuming...but definitely worth the effort!!!
  6. Add garlic and the chillies and give a quick stir. Care to be taken not to burn the garlic.
  7. Add the choy sum stems and stir fry for about a minute.
  8. Add the choy sum leaves and stir fry until they wilt a little bit - but not too much. You need to maintain the crunch of the leaves and not let it become wimp and soggy.
  9. Add the flat noodles, the sauces and sugar.
  10. Stir fry the contents  for about a minute until the sauces gets mixed evenly and the noodles are all separated. If the noodles are too sticky feel free to add a few tablespoons of water which will help separate them out. (And also create a sizzle to add to give you a restaurant effect.)
  11. Move the noodles to the side and create a space in the centre of the wok. Break open the eggs and create a scramble. Once the eggs are 3/4th cooked mix in the noodles.
  12. Toss in the basil leaves and give a quick stir for about a minute.
The Result:

Enjoy...

C


Sunday, April 10, 2011

Kao Pad Krapao - Che

Ok...I am not using some swear words here. The title basically means Veggie fried rice with basil (in Thai).


Amongst the various varieties in Thai fried rice, this one has been the most widely available dish in US and Aussie. Am yet to figure out the Curry Fried Rice that Eagle Thai dished out and I've never been able to get the same dish anywhere else. I've tried requesting the same in many Thai restaurants, but most often have been rejected. Probably it is not too authentic? I've attempted to make that myself a few times, but haven't reached there yet. :(

Chilli Basil Fried rice - usually made with chicken, this time I had made it with veggies and egg.

Ingredients:

Jasmine Rice (Any other rice will not get you the same effect)
Thai Red Chillies
Garlic
Basil Leaves (A generous bunch)
Veggies (typically, carrot, peas and corn)
Red Onions
Capsicum (preferably red)
Eggs
Fish Sauce
Soya Sauce

The method:


  1. Pre-cook the jasmine rice at least about 3-4 hours prior to making this fried rice. Many people do suggest the previous day's rice. However in the interest of time as long as the rice is not warm (rather cold to touch) it is good enough. 
  2. Sautee the chopped / smashed garlic and red chillies in a generous amount of oil on low/medium heat for about 15-20 seconds.
  3. Add the veggies except capsicum (with the wok in High head). If you prefer meat, this would be a good time to add. Stir fry the mix to an extent where your main ingredient (veggie/meat) is cooked enough.
  4. Add the cold rice to this mix along with fish sauce and soya sauce. The amount of fish sauce needs to be taken care. You will need to get the strong smell of fish sauce at this time.
  5. Mix up the contents for about less than a minute.
  6. Separate the rice and create a gap in the middle of the wok / kadai. Add some oil and break open the eggs. Try not to beat the egg in advance for a  Thai fried rice. 
  7. Once the eggs are 3/4th cooked, mix in the rice and stir fry along with the remaining capsicum and basil leaves.
  8. The smell of the fish sauce should now give way to the aroma of the basil leaves.
  9. Kao Pad Krapao is now ready to be served.
  10. Yes, you can garnish with coriander leaves (Cilantro for those in the US of A) if you would like. 
Enjoy

C
Potential Bloopers:
  1. Rice gets too sticky and soggy. When the rice (or noodles) gets too sticky in the kadai while mixing, a few ml of water added helps to loosen up the starch and separate out the rice.
  2. Fish sauce not enough. This did happen to me where I was out of stock for the amount of rice I had thought of.
  3. Watch out on the Thai red chillies. They are dynamite. :-)

Thursday, April 7, 2011

Kothu Parotta


Every country boasts of it's own "street food". Pad thai for Thai, Kway Teaw for Malay, probably a hot dog for the US of A. When it comes to South Indian cusine, my vote would be for Kothu Parotta. Kothu parotta (meaning "chopped" up parotta) is a typical road side delicacy you would find on any road side non-vegetarian stall in Tamil Nadu. If my memory serves right, the first time I had a "professional" kothu was on a roadside shop on the way from Coimbatore to Salem. Don't remember the place, but probably returning from one of my uncle's wedding. My first successful kothu  was done in Portland, OR with the help of THE Mangalam masala. I have to time the preparation of KP right along with making a chicken curry and hence the perfect sequel to Chicken Chettinad. Left over chicken curry gives the extra kick or the professional touch. 

What goes in:

  1. Parotta. This has to be the flaky kerala style or ceylon style parotta available in Indian stores. For those in India...try to get it from the nearby kaiyendhi bhavan (road side shop).
  2. Eggs
  3. Onions
  4. Tomatos
  5. Chicken masala powder
  6. Chicken curry (Should not be too thick. If thick, lighten it up with water.)
  7. Green chillies 
  8. Curry leaves 

The method:
  1. Chop up the parotta into as small pieces as possible. Recently I found a technique with the frozen parottas. I heat it up on a tava and chop (kothu) it up with a knife. I used to do it with hand but found the knife to be doing a better job. (Edit: I used a blender today and "pulsed" the parotta. It gave a texture close to what you get in a restaurant.)
  2. Beat up the eggs separately to make an even spread. (Or just break it open on the parotta later).
  3. Sautee mustard seeds until they splatter.
  4. Sautee the green chillies and onions for a few minutes.
  5. Add the tomatoes to the mix. Need to make sure we dont over cook the tomato. Should maintain the chunky pieces.
  6. Add the chopped up parotta and the masalas (powder and half of the chicken curry).
  7. Add salt as required.
  8. Mix it up well so the masala gets mixed evenly.
  9. Create a space in the middle of the kadai by pushing the parotta mix to the side. (Alternatively just break open the eggs on the parotta or pour the beaten egg over the parotta).
  10. Pour the beaten egg and scramble it until its 3/4ths cooked.
  11. Mix up the parotta along with the scrambled egg so that a light coating of the egg is applied on to the parotta as well.
  12. Empty the remaining chicken curry into the mix.
  13. Add curry leaves and coriander as garnish and give it a final toss.
The result:

Enjoy

C

Chicken Chetti(nad)

Hi,

Am back with a bang after a short break. It is probably easy to write as we cook, but hey someone has got to wash the vessels as well. ;-)

Chicken - wow...sooo many memories with this word. I still remember the very first time I tasted chicken (knowingly at least!!). Many might know that I was not "supposed" to eat chicken or non-vegetarian for that matter. There's enough stories for my clandestine efforts of eating chicken. Will save that for later.

Probably the very first time I've actually cooked a chicken dish was in Portland, OR. Once I saw a colleague of mine prepare this dish - Chicken Chettinad and I tried to replicate it after a few weeks. My friends then named the dish after me - Chicken Chetty or probably they named me after the Chicken. Damn...first name last name confusion. For a very long time "Chicken Chetty" was popular amongst the Pacificorp crowd in Portland and it tagged along for a long long time.

For a while it has become an interest of mine to prepare my own spice mix. Who needs the packet masalas!!

So this is what went in the masala:

Just in case you are not able to figure out everything from the picture, here's what went in:

  • Dried Red Chilly 
  • Fennel seeds 
  • Poppy seeds
  • Black pepper corn
  • Bay leaves (careful not to overdo this)
  • Cinnamon stick
  • Coriander seeds
  • Elaichi seeds
  • Star aniseed 
  • Channa dal  - in case you prefer to have a thicker gravy
Fry this mixture in a kadai on medium heat - no oil please. Fry them until you can smell the spices. Cool and grind it up in a blender. Try to sieve the ground mixture so you get a nice smooth powder.

Other Ingredients:
  • Chicken (duh)
  • Onions (preferrably red). Shallots are even better. However considering the cost, I stick to red onions.
  • Tomatoes (roughly 1 or 2 less than the onions)
  • Ginger-Garlic paste
  • Mustard seeds
  • Curry leaves
  • Coriander leaves
  • Turmeric powder
  • Sesame oil
The method:

I prefer to blend the onions and tomatoes if I am looking for a nice gravy. You may skip this step if a consistent gravy is not on the cards.

  1. Heat up the oil and sautee the mustard seeds and some curry leaves.
  2. When mustard splutters add the onions (or the onion tomoato paste).
  3. Continue sauteeing the mix until for about 2-3 minutes.
  4. Add chicken, turmeric powder and ginger garlic paste.
  5. After a few minutes add the masala mix along with salt and continue stirring.
Initially it looks like:

Add a good amount of water to this mix and cook for about 30 minutes with a lid on. Being chicken drumsticks, do need to allow extra time for it to cook. Uma prefers a pressure cooker, but me prefer to slow cook it. Continue cooking until the gravy becomes:


Garnish the dish with curry leaves and coriander leaves.

Best served with plain white rice.

Happy Cooking!!

C